
The Room That Takes Longest — and Why It’s Worth Starting First
Over 30% of people consider packing the kitchen the hardest part of moving, according to a survey cited by MyMovingJourney’s March 2025 guide. It is not hard to understand why. The kitchen contains more individual items than any other room in most homes — fragile glassware, heavy appliances, awkwardly shaped cookware, open pantry staples, sharp utensils, and a drawer full of things you’ve never quite found a category for. It is also the room where damage claims most often originate. Half of UK movers report items being damaged during a move, with fragile kitchen items like crockery frequently among them, per Compare My Move’s data cited in a 2026 packing guide.
The kitchen is also the room that gives you the most strategic leverage. Because so much of it can be packed weeks before your move — everything you’re not actively cooking with — starting early transforms one overwhelming day into a series of manageable sessions. Professionals completing kitchen packing on average need at least two days compared to one day for most other rooms, according to Caddy Moving’s 2026 guide based on 30,000+ moves.
This checklist covers every item in a standard kitchen, with specific techniques for fragiles, appliances, pantry, and the things most people forget until moving day.
Supplies You Need Before You Start
Gather everything before you open a single cabinet door. Stopping mid-pack to go buy more tape or boxes doubles your packing time.
For the kitchen specifically, stock:
- Small and medium boxes only — never large for kitchen items. Heavy goods in large boxes become impossible to lift safely and increase breakage risk from box failure.
- Dish pack boxes — double-walled specialty boxes designed for fragile kitchenware. Use these for plates, bowls, and glasses. They are worth the small premium.
- Cell dividers for glasses if available — these cardboard inserts create individual compartments that eliminate glass-to-glass contact inside the box.
- Packing paper (unprinted) — your primary wrapping material for most kitchen items. Use paper for 80% of kitchen packing and save bubble wrap for genuinely fragile specialty items. Printed newspaper transfers ink onto dishes and should be avoided.
- Bubble wrap — for crystal, stemware, and genuinely delicate ceramics.
- Foam sleeves or pouches — for glasses and stemware if you have them.
- Heavy-duty packing tape and tape dispenser.
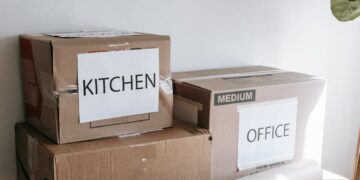
- Permanent markers — label every box on top and on at least one side.
- Zip-lock bags in multiple sizes — for spice packets, appliance hardware, and loose items.
- Plastic wrap or stretch wrap — for sealing any open liquids or containers that might spill.
Step One: Declutter Before You Pack a Single Box
Before anything goes in a box, do a fast sort of every cabinet, drawer, and pantry shelf. Moving is the clearest possible reason to get rid of things you don’t use — every item you eliminate is one less item to wrap, label, carry, transport, unpack, and find space for.
Specifically target:
- Expired pantry items — check every date before packing
- Duplicate utensils, gadgets, and appliances you’ve never used
- Plastic containers without matching lids
- Appliances that have sat in the back of the cabinet for a year
- Dishes, glasses, and mugs beyond what your household actually uses
Donate usable items to a food bank (non-perishables), a charity shop, or via your local Buy Nothing group. Sell appliances in good condition on Facebook Marketplace — a Vitamix blender or stand mixer can meaningfully offset moving costs.
Step Two: The Right Packing Order
Within the kitchen, pack in this order to keep your household functional as long as possible:
Pack first (weeks before the move):
- Seasonal items: holiday cookie cutters, special occasion serving pieces, items used once or twice a year
- Duplicate appliances and gadgets you won’t miss
- Books, recipe binders, and rarely-used references
- Excess dishes, glasses, and mugs beyond your everyday set
- Specialty cookware you’re not actively using: a stock pot, a roasting pan, a cast iron skillet
Pack second (one to two weeks before):
- Most pantry items — canned goods, dried staples, spices (see pantry section below)
- Small appliances beyond the two or three you use daily
- Mixing bowls and baking equipment
- Decorative items, plants, and artwork on kitchen walls
Pack last (final days before the move):
- Daily-use dishes, glasses, and cookware
- Coffee maker and morning essentials
- What’s left in the pantry
- Cleaning supplies (needed until the very end)
Leave out: one pot, one pan, a few plates and glasses, silverware, your coffee setup, and whatever cleaning supplies you’ll need for move-out cleaning. These go in the “open first” bag or the final daily-use box.
How to Pack Fragile Items
Plates and Bowls
The most important technique in kitchen packing: pack plates vertically — standing on edge like vinyl records in a crate — rather than flat. A plate standing on its edge distributes impact along the structural rim. A plate lying flat takes the full force of any drop or compression across its widest, most vulnerable surface.
The method:
- Place a 2 to 3 inch layer of crumpled packing paper at the bottom of the box — this is the cushion base that prevents direct impact.
- Wrap each plate individually in packing paper, folding it fully around the plate with several layers.
- Stand plates on edge in the box, side by side like records.
- Fill all gaps between plates with crumpled paper so nothing shifts.
- Add another 2 to 3 inch layer of crumpled paper on top before sealing.
- The box should feel solid when you press the top — no flex.
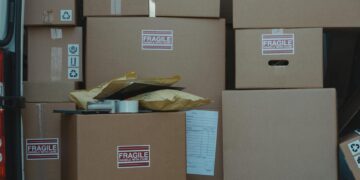
- Mark the box FRAGILE on all four sides and THIS SIDE UP on top.
Use small or medium dish pack boxes only. A full box of plates in a large box is too heavy to lift safely and the box bottom may fail.
Glasses and Mugs
Use cell dividers if available — they are the single most effective protection for glassware. If not:
- Wrap each glass individually, starting at the bottom and tucking paper inside the glass as you spiral down, then wrapping the exterior.
- For stemware, wrap the stem separately with extra paper or foam before wrapping the whole glass.
- Place glasses upside down in the box — the rim is typically thinner and more vulnerable than the base.
- Line the bottom of the box with crumpled paper before placing any glasses.
- Pack glasses tightly enough that they cannot shift, but not so tightly that they press against each other.
- Fill every void with crumpled paper before sealing.
- Mark FRAGILE on all sides.
If you have glasses with sentimental or monetary value, consider wrapping them in both paper and bubble wrap.
Pots, Pans, and Cookware
Non-stick surfaces scratch easily from contact with other surfaces. Wrap each pan in packing paper before stacking. For cast iron, wrap in paper and pack in small boxes — cast iron is extremely heavy and small boxes are essential.
Nest cookware where possible: stack smaller items inside larger ones, with a sheet of packing paper between each piece. Pack lids separately and secure them with packing paper so they don’t rattle.
For non-stick skillets: place a sheet of foam or packing paper between each stacked pan. The coating is easily scratched by metal-on-metal contact.
Knives and Sharp Items
Knives should never be packed loose in a box. The risk of injury to the person unpacking is real and the risk of other items being sliced through the box is also real.
Options:
- Keep knives in a knife block if you have one — wrap the whole block in packing paper, then in a layer of moving blanket or bubble wrap, and pack it upright in a box.
- Wrap each knife individually in multiple layers of packing paper and secure with tape so the blade is fully covered and cannot penetrate the wrapping.
- Use cardboard sleeves if available.
- Label the box SHARP KNIVES on the outside.
Fine China and Heirlooms
For china, crystal, or any item with significant monetary or sentimental value: wrap in acid-free tissue paper first, then packing paper, then a layer of bubble wrap. Pack these in double-walled dish pack boxes, never in standard moving boxes. Consider transporting truly irreplaceable items in your car rather than on the truck.
How to Pack Small Appliances
Most small appliances pack best in their original boxes — save these if you still have them. Original packaging is designed specifically for the item’s dimensions and fragility profile.
If you don’t have original boxes:
- Use blankets as bottom and side liners for appliance boxes — they dampen vibration better than packing paper alone.
- Remove all detachable cords, blades, attachments, and accessories and pack them in a labeled zip-lock bag.
- Tape the zip-lock bag to the outside of the appliance’s box so hardware cannot become separated.
- Wrap the appliance body in packing paper or a dish towel before boxing.
- Fill all void space with crumpled paper so the appliance cannot shift.
Specific appliances:
Coffee maker: Remove the carafe (pack separately wrapped in paper), remove the filter basket, drain the reservoir completely. Wrap the carafe in bubble wrap.
Blender: Remove the jar from the base. Pack them separately. The jar is fragile; the base is not. Remove and bag the blades.
Toaster/toaster oven: Remove the crumb tray and clean it. Tape the cord to the appliance. Wrap in packing paper.
Stand mixer: These are very heavy. Pack in its original box if possible, or in a small, sturdy box reinforced with extra tape. Attach the bowl and accessories separately. Do not put a stand mixer in a large box with other items.
Microwave: If it’s a countertop microwave going with you, use the original box or a large specialty box. Remove the turntable glass plate, wrap it separately in bubble wrap, and pack it alongside the microwave. Note: many people opt to leave microwaves behind or sell them locally rather than paying to move a bulky, low-value appliance.
How to Pack the Pantry
Pantry packing has two complications that other areas don’t: weight and liquid spillage.
Canned goods: Pack only in small boxes. A medium box of canned goods weighs 30 to 40 pounds. A small box is at the safe limit. Do not overpack canned goods into any box larger than small — the box bottom will fail and the contents will scatter on the truck floor.
Dry goods: Seal every open package before boxing. Flour, sugar, pasta, rice, oats — any open bag should be placed inside a zip-lock bag and sealed. Pantry insects can be transferred in open packaging and become a problem at the destination.
Spices: Store in sealed jars if possible and place them all in a large zip-lock bag to catch any spills. Spice containers are small and tend to roll around in boxes, making them hard to find. Grouping them in a bag keeps them together.
Oils, vinegars, and liquids: Tighten every cap. Wrap the top of the cap in plastic wrap and secure with a rubber band. Stand all liquid bottles upright in a box — never on their side. For any bottle that’s partially full and at risk of leaking, place it in a zip-lock bag before boxing.
What not to pack:
- Perishables: meat, dairy, eggs, fresh produce — these cannot go in a moving truck. Plan to use them up, donate them, or carry them in a cooler for very short local moves.
- Open bags of staples you won’t use up before the move: donate to a food bank rather than risk spilling bulk flour across boxes.
- Most movers will not transport flammable liquids, aerosols, or certain chemical cleaning products. Check with your specific carrier.
How to Pack Kitchen Furniture
Kitchen table: Disassemble if the legs come off — this dramatically reduces the table’s footprint on the truck and eliminates the risk of leg damage in transit. Bag all hardware in a labeled zip-lock bag and tape it to the table surface. Wrap the tabletop in moving blankets.
Kitchen chairs: Stack chairs seat-to-seat with a layer of packing paper between each seat surface. Wrap the stacked set in stretch wrap or moving blankets. If chairs have cushions, remove them and pack them separately or use them as padding around other items.
Bar carts and kitchen islands on wheels: Empty completely, remove any glass shelves and pack them as you would a mirror, and lock or tape the wheels so the piece doesn’t roll during loading.
The Items Most People Forget
These kitchen items get left behind or forgotten more often than any others:
- The contents of the cabinet above the refrigerator — almost always overlooked until someone does the final walkthrough
- Items stored on top of the refrigerator — frequently forgotten until the mover tries to move it
- The inside of the oven — some people accidentally leave baking sheets or a broiler pan inside
- Cleaning supplies stored under the sink — these are needed until the very last cleaning task
- Reusable grocery bags hung on hooks or stuffed in a drawer
- Dish towels, oven mitts, and pot holders — small and easy to overlook
- The junk drawer contents — gather everything, sort into bags by category
The Kitchen Packing Checklist
Supplies confirmed:
- [ ] Small and medium boxes only (no large)
- [ ] Dish pack boxes for plates, bowls, glassware
- [ ] Cell dividers if available
- [ ] Packing paper (unprinted)
- [ ] Bubble wrap for stemware and crystal
- [ ] Heavy-duty tape and dispenser
- [ ] Zip-lock bags (multiple sizes)
- [ ] Markers — label every box before it leaves the room
Fragile items:
- [ ] Plates packed vertically, individually wrapped, cushion base in box
- [ ] Glasses packed upside down, individually wrapped, no direct contact
- [ ] Stemware wrapped in paper then bubble wrap
- [ ] Pots and pans wrapped individually with paper between each layer
- [ ] Knives wrapped fully in multiple packing paper layers, box labeled SHARP
Appliances:
- [ ] All cords, blades, and attachments removed and bagged
- [ ] Hardware bags taped to the outside of each appliance box
- [ ] Appliance interiors empty and clean
- [ ] Coffee maker carafe wrapped separately
- [ ] Blender jar and base packed separately
- [ ] Turntable plate removed from microwave and wrapped separately
Pantry:
- [ ] All open packages sealed or placed in zip-lock bags
- [ ] Canned goods in small boxes only
- [ ] All liquid caps tightened and wrapped
- [ ] All liquids packed upright
- [ ] Spices grouped in a zip-lock bag
- [ ] Perishables not packed — used up, donated, or cooler
Labeling:
- [ ] Every box labeled on top and at least one side
- [ ] FRAGILE on all sides of fragile boxes
- [ ] THIS SIDE UP on fragile boxes
- [ ] HEAVY on any box over 40 lbs
- [ ] Room label: KITCHEN on all boxes
Before closing the room:
- [ ] Cabinet above refrigerator checked
- [ ] Top of refrigerator cleared
- [ ] Oven checked (no forgotten pans inside)
- [ ] Under-sink area cleared
- [ ] Junk drawer emptied
- [ ] Hook items (bags, towels, oven mitts) removed
The Bottom Line: Two Weeks, Not Two Days
The kitchen is the room that most rewards an early start and most punishes a last-minute approach. Professionals need at least two days to pack a standard kitchen thoroughly. DIY movers who start with adequate time, the right supplies, and the techniques above consistently arrive at the destination with significantly fewer broken items than those who rush.
Start three to four weeks before your move. Pack everything you’re not actively cooking with in the first two weeks. Leave only daily essentials for the final days. The kitchen will take care of itself — if you give it the time it deserves.
About the Author
For the past five years, I’ve owned and operated a moving and portable storage company, helping real people navigate one of the most stressful experiences there is—moving.
I’ve seen it all: last-minute packing chaos, broken boxes, missed timelines, and way too much bad advice online.
That’s exactly why I created Home Moving Secrets.
This site is built to give you simple, practical, no-BS moving advice that actually works—from packing smarter and saving money to staying organized from start to finish.
Everything here is based on real-world experience, not guesswork.
My goal? To help you move smarter, stress less, and feel in control every step of the way.
Last reviewed: May 2026
Want our FREE moving guide? Subscribe to our email list.
Looking to learn more about our Ultimate Moving Planner Bundle?
The stress-free, step-by-step system to plan your move in hours—not weeks.
Moving is overwhelming…boxes everywhere, deadlines piling up, utilities to transfer, address changes to remember, and a million tiny tasks you know you’re forgetting.
But it doesn’t have to feel like chaos.
The Ultimate Moving Planner Bundle is your complete AI-powered moving system that turns your entire move into a simple, organized, step-by-step plan—customized to your exact situation.
Are You a Moving Company?
Want more customers like the ones reading this?
We created a simple AI-powered system that helps moving companies:
- Generate more local leads
- Book more jobs
- Improve their online presence