Why You Should Clean Before You Unpack a Single Box
There is a narrow, irreplaceable window between getting the keys to your new home and carrying in the first box. It is the only moment in your entire tenure at that address when every room is completely empty, every surface is fully accessible, and you can clean to a standard that simply isn’t possible once furniture is in place and boxes are stacked against walls.
“Move-in ready” doesn’t mean deep-cleaned. While previous owners or tenants may have completed a surface-level clean before leaving, there could be leftover allergens, grime, bacteria, and odors hidden in various spaces that might pose issues later, according to COIT Cleaning and Restoration’s updated 2025 guide. Even brand-new construction accumulates construction dust, paint residue, drywall particulate, and adhesive residue that needs to be removed before you live comfortably in the space. Homes that have sat vacant — even briefly — collect dust in every vent and along every baseboard.
The practical argument is just as strong as the hygiene one. Cleaning before furniture arrives means you can reach behind the refrigerator cavity before the refrigerator is there, scrub the inside of every cabinet before it’s full of dishes, clean window tracks before the blinds are rehung, and mop every square foot of floor without moving a single piece of furniture. Most professional cleaning experts identify an empty home as significantly easier to clean thoroughly — and significantly faster — than one where furniture has to be worked around.
A complete deep clean of a new home takes 4 to 8 hours depending on size and condition. Do it once, before you move in. You won’t get a better opportunity for the duration of your time there.
Before You Start: Supplies and Strategy
The Supply Kit
Gather everything before you start so you’re not making trips back to the hardware store mid-clean. A complete move-in deep cleaning kit includes:
- All-purpose disinfectant spray
- Glass and window cleaner
- Bathroom disinfectant and toilet bowl cleaner
- Oven cleaner — apply to the oven the night before to let it soak, then wipe clean the next day
- Grout cleaner or diluted bleach solution
- Degreaser for stovetop, hood vent, and backsplash
- Baking soda and white vinegar — useful for drains, dishwasher, and washing machine cycles
- Microfiber cloths and sponges (multiple — don’t use bathroom cloths in the kitchen)
- Toilet brush
- Mop and bucket
- Vacuum with attachments (crevice tool, upholstery brush, extension wand)
- Broom and dustpan
- Step stool for ceiling fans and top-of-cabinet surfaces
- Rubber gloves
- Trash bags
Optional but recommended:
- Magic Eraser sponges for wall scuffs and marks
- Carpet cleaner or steam mop if the home has carpet or hard floors that need more than mopping
- HEPA vacuum if the home is newly constructed or recently renovated — construction dust is fine enough that standard vacuums recirculate it into the air
The Strategy: Top to Bottom, Back to Front
Clean from the top of each room down — ceilings, light fixtures, shelves — before floors. Dust and debris fall, and you don’t want to re-clean surfaces after working on the floor. Work from the rooms furthest from the exit toward the front door, so you’re not walking across freshly mopped floors.
Within each room, clean in this order: ceiling, ceiling fan and light fixtures, walls and windows, furniture-height surfaces and appliances, then floors last.
The First Walkthrough
Before you clean anything, walk through every room and note what you see. Look for signs of mold or mildew — particularly in bathrooms, under sinks, and in corner baseboards. Check under sinks for evidence of plumbing leaks. Look at the caulk around bathtubs and showers. Check window tracks for moisture damage or pest activity. Look at the ceiling corners for any water staining from above. Document anything significant with timestamped photos and report it to your landlord or note it as a buyer. If you’re renting, this documentation protects you from being held responsible for pre-existing conditions at move-out.
Room by Room: The Deep Clean Sequence
Kitchen
The kitchen is the most important room to deep clean before you load any food, dishes, or cookware into it. It is also the room where previous occupants left the most hidden grime — inside appliances, in cabinet interiors, in grease-coated hood vents, and inside drains.
Refrigerator: Empty the refrigerator completely. Remove all shelves, drawers, and compartments and wash them separately in the sink with dish soap and warm water. Dry them completely before reinstalling. Wipe down the interior walls and door seals with a disinfectant solution. Clean the exterior. Vacuum or brush the refrigerator coils — coils clogged with dust and debris force the motor to work harder and shorten the appliance’s lifespan. Cleaning the coils is one of the most commonly skipped tasks in any move-in clean and one of the most consequential for the appliance’s long-term function.
Oven and stovetop: If you applied oven cleaner the night before, wipe out the interior now. Remove racks and clean them separately in the sink. For gas stovetops, remove the grates and clean beneath them — grease accumulates in the tray under the burners and is impossible to see without removing the grates. For electric or induction surfaces, use a cleaner appropriate to the cooktop material. Degrease the hood vent and replace the filter if the manual recommends it.
Microwave: Clean the interior walls, ceiling, and turntable plate. A simple method: place a bowl of water and white vinegar in the microwave and run it for three to five minutes. The steam loosens dried food residue, making wiping easy.
Dishwasher: Run an empty cycle with a cup of white vinegar on the top rack, then run a second short cycle with baking soda sprinkled in the bottom. This removes mineral deposits, odors, and residue. Remove and clean the filter — most people have never cleaned a dishwasher filter and most dishwashers have one.
Cabinets and drawers: Wipe the interior of every cabinet and drawer with a damp disinfectant cloth. Wipe the exterior faces and handles. This is the task most likely to reveal things you weren’t expecting — spilled flour packed into cabinet corners, grease on the cabinet faces above the stove, sticky residue in pantry shelves. Shelf liner paper is an optional finishing touch that makes future cleaning easier and protects cabinet interiors.
Countertops, sink, and backsplash: Disinfect countertops with an appropriate cleaner for the surface material — granite and stone require non-acidic cleaners. Scrub the sink and faucet, including the drain and disposal if present. Pour a mixture of baking soda and boiling water followed by white vinegar into the drain to clear any odor-causing buildup. Scrub the backsplash tile and grout, paying particular attention to the grout lines immediately behind the stove where grease accumulates.
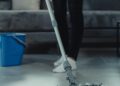
Floors: Sweep, then mop. Pay close attention to the area under and behind where the refrigerator and stove will sit — these areas accumulate grease drips and debris over years. Clean them now, before the appliances are in position.
Bathrooms
Bathrooms carry the highest concentration of bacteria and germs of any room in the home, and the cleaning priority here is genuinely about hygiene rather than just aesthetics.
Toilet: Consider replacing the toilet seat entirely — they’re inexpensive ($25 to $50 for standard seats) and give you complete confidence that you’re starting fresh. If you’re keeping the existing seat, disinfect the entire toilet: bowl (including under the rim), seat, lid, tank, base, and the floor behind and around the base where grime accumulates invisibly. Use a dedicated toilet brush that stays with this bathroom.
Shower and tub: Scrub the shower and tub surfaces, paying specific attention to grout lines, which trap mold and mildew that resists superficial cleaning. A grout brush and a diluted bleach solution or dedicated grout cleaner is required for thorough grout cleaning — a standard sponge won’t reach into the porous grout surface. Clean the showerhead by soaking it in a bag of white vinegar for an hour, which removes mineral buildup that affects water pressure. Clean the drain and remove any accumulated hair and debris.
Shower door or curtain rod: Clean the shower door tracks — these accumulate soap scum and mold in grooves that are almost never cleaned in routine maintenance. Replace the shower curtain and liner if one was left behind.
Sink and vanity: Scrub the sink, faucet, handles, and drain. Open the vanity cabinet and clean the interior, including under the sink where humidity and occasional drips create conditions for mildew.
Mirror and fixtures: Clean the mirror with glass cleaner. Wipe down all light fixtures. Clean the exhaust fan cover — this is one of the most universally neglected surfaces in any home. A clogged bathroom fan doesn’t remove moisture effectively, which contributes to the mold conditions you just cleaned away.
Floors: Sweep, then mop, paying close attention to the area behind and around the toilet where debris accumulates in areas that are hard to reach once the bathroom is in use.
Bedrooms
Bedrooms accumulate allergens — dust, pet dander from previous occupants, dust mites in carpet — that affect sleep quality and respiratory health in ways you may attribute to other causes.
Ceilings and ceiling fans: Start at the top. Dust ceiling corners where cobwebs accumulate. Ceiling fan blades carry remarkable amounts of dust — wipe each blade thoroughly rather than just spinning the fan and distributing dust across the room.
Windows and window treatments: Clean the interior side of all windows with glass cleaner. Clean the window sills and, critically, the window tracks — these accumulate dirt, dead insects, and moisture residue that make windows difficult to open and close and can create mold conditions. If the previous occupants left blinds or curtains, clean them before using them or replace them if their condition is uncertain.
Closets: Wipe down all closet shelves, the closet rod, and the closet floor. Closets in previously occupied homes often carry odors from clothing storage and cleaning products. Running the space with doors open for a day before unpacking allows any residual odors to dissipate.
Walls and baseboards: Check walls for marks and scuffs. Wipe down baseboards throughout the room — these are a dust accumulation surface that goes unnoticed until you’re close to the floor. In new construction, baseboards often carry paint residue and construction dust.
Floors: Vacuum carpet thoroughly, running the vacuum slowly in two directions to capture embedded debris. For deep carpet cleaning, consider renting a carpet cleaning machine or hiring professional carpet cleaning before you move furniture in. A carpet that’s professionally cleaned before furniture arrives is clean throughout — not just in the visible walkways. Sweep and mop hard floors.
Living Room and Common Areas
Dusting and light fixtures: Dust all surfaces from the top down. Wipe ceiling fan blades. Clean light fixtures and any built-in shelving or entertainment unit areas.
Walls: Wipe down light switches and outlet covers — these are high-touch surfaces that carry significant bacteria buildup and are frequently skipped in routine cleaning. Use a Magic Eraser or appropriate wall cleaner for marks and scuffs on painted surfaces.
Fireplace (if applicable): If the home has a wood-burning fireplace, have it professionally inspected and cleaned before use. Creosote buildup in flues is a fire hazard, and inspections of fireplaces in newly purchased homes are standard practice. If it’s a gas fireplace, check the logs and burner for dust accumulation.
Windows: Clean all windows. In the living room especially, windows that face south or west accumulate significant exterior grime that reduces natural light.
Floors: Vacuum and mop. In wood floors, inspect for any areas where the finish is worn or where gaps between boards have accumulated debris — these are best addressed before furniture is placed.
Home Office
If you work from home, the cleanliness of your workspace affects your health and focus.
Ventilation: Clean the supply and return air vents in the office, particularly if the home is newly renovated or if you notice a dusty smell when the HVAC runs. Air duct cleaning for the whole home is worth considering for homes with significant prior occupancy or visible dust accumulation in vents.
Surfaces: Wipe down all desk surfaces and shelving. Clean any built-in cabinetry.
Floors: Vacuum and mop. Under-desk areas accumulate debris quickly once in use — clean them now.
Laundry Room
Washing machine: Run a cleaning cycle — most modern washers have a dedicated drum clean cycle. If yours doesn’t, run a hot water cycle with two cups of white vinegar in the drum and a half cup of baking soda. This removes detergent residue, mineral deposits, and odor-causing bacteria. Wipe down the door seal on front-loaders, which develops mold in the folds. Clean the detergent dispenser tray.
Dryer: Clean the lint trap and the lint trap housing — push a narrow brush or the crevice tool of your vacuum into the trap housing to remove accumulated lint that the trap itself doesn’t catch. Wipe down the drum interior with a damp cloth.
Sink and surfaces: If there’s a utility sink, clean it. Wipe down any counters and shelving. Clean the floor — lint and detergent residue make laundry room floors perpetually grimy.
Garage and Basement
If your new home has a garage or basement, these spaces deserve attention before they fill with your belongings.
Garage: Sweep out all debris and dust. Wipe down any built-in shelving. Check for oil stains on the floor — these can often be lifted with a concrete degreaser. Look for evidence of pest activity: droppings, chewed materials, or nesting in corners. Check the weatherstripping on the garage door and any door leading from the garage into the house — these are common pest entry points.
Basement: Check for any moisture, efflorescence (white mineral deposits on concrete walls, indicating water penetration), or mold. These are issues to document and report if you’re renting, or address before move-in if you own. Clean floors and any built-in shelving. Check the sump pump if one is present — confirm it operates by pouring a bucket of water into the pit.
The Tasks Most People Forget (That Matter Most)
Every deep cleaning guide covers the kitchen and bathrooms. The following items appear on almost no informal cleaning list but significantly affect your living environment:
HVAC filter replacement. Replace the air filter immediately and mark the new one with the installation date. Most filters need replacement every 30 to 90 days depending on type. More importantly, the filter in a previously occupied home carries whatever was in the air during that occupancy — pet dander, dust, allergens from renovations. Starting with a fresh filter means the air you breathe from day one is circulating through a clean medium. Note the filter size and set a phone reminder for the replacement interval.
Air vent cleaning. Remove every supply and return air vent cover in the home and wash them with soap and water. While the covers are off, vacuum as far into the duct opening as your crevice tool will reach. In homes with significant prior occupancy or recent renovations, professional air duct cleaning removes debris accumulation that vacuum tools can’t reach.
Doorknobs and light switches throughout the home. These are the most touched surfaces in any home and are almost never cleaned in standard housekeeping. Disinfect every doorknob, light switch, and outlet cover before move-in — they’ve been handled by movers, inspectors, previous owners, and real estate agents.
Under-sink cabinet interiors. The cabinet under every sink in the home accumulates moisture, cleaning product residue, and often shows early signs of plumbing leaks. Clean every under-sink space and confirm there’s no active moisture issue before loading it with cleaning products and supplies.
Refrigerator water line and ice maker. If the refrigerator has a water dispenser or ice maker, replace the water filter if one is present (it will be in the refrigerator door or at the back). Run several gallons of water through the dispenser to flush the line before drinking from it.
Garbage disposal. Deodorize and clean the disposal by running it with ice cubes and rock salt, then flushing with cold water. Follow with a half lemon or lime to eliminate odor from accumulated residue.
Professional Cleaning: When to Hire Out and What It Costs
Some people have the time, physical capacity, and preference to deep clean their new home themselves. Others would rather hire professionals and spend that time on other move-in logistics. Both are legitimate choices — the question is which tasks make more sense to hire out.
What professional cleaners do better:
Carpet cleaning is the area where professional results most consistently exceed DIY results. Professional equipment produces stronger suction and hotter water extraction than rental machines, removing embedded debris and allergens that consumer units leave behind. Professional carpet cleaning before move-in, before furniture is in place, is the most effective version of that service you’ll ever be able to book.
Tile and grout cleaning — particularly for bathroom tile, shower grout, and kitchen backsplash — is another category where professional results justify the cost. Grout is porous and accumulates bacteria and mold that standard cleaning doesn’t fully address. Professional cleaning with commercial-grade products and equipment produces visibly better results.
Air duct cleaning, while optional, is worth considering for homes with significant prior occupancy, visible dust accumulation in vents, or any history of pets in the home.
What it costs in 2026:
Move-in cleaning services cost between $120 and $280 for standard residential cleanings in most markets, with deep cleans ranging from $200 to $400, according to multiple 2025–2026 sources including Angi and HomeAdvisor. The national average across home sizes is approximately $360, per Angi’s 2026 data. Professional carpet cleaning adds $40 to $90 per room on average. Tile and grout cleaning adds $100 to $200.
Time estimates by home size: a one-bedroom apartment takes 1 to 2 hours with a professional crew; a 4-bedroom home can take a half day or longer, per TaskRabbit’s March 2026 cleaning cost guide.
The hybrid approach that most experienced movers recommend: do the standard cleaning yourself and hire professionals specifically for carpet cleaning and any surface that genuinely requires commercial-grade equipment. This produces professional-level results in the areas that matter most while keeping the overall cost well below a full professional service.
The Final Steps Before Your First Box Comes In
Once every room is clean, a few finishing touches complete the move-in preparation:
Change the locks. You don’t know who has copies of the previous occupant’s keys — former housekeepers, dog walkers, family members, contractors. Rekeying locks costs $50 to $150 per lock. For a new purchase, it’s the most important security step of move-in week.
Replace toilet seats. As mentioned above — inexpensive, definitive, and provides complete peace of mind.
Test every outlet and light switch. Before furniture makes outlets inaccessible, confirm everything works. Note any that don’t and report them if renting.
Locate the electrical panel, water main shutoff, and gas shutoff. These are things you want to know before you need them in an emergency, not during one.
Photograph every room. Date-stamped photos of your clean, empty apartment or home are your record of the condition at move-in. If you’re renting, this documentation protects your security deposit at move-out. Store the photos somewhere you won’t accidentally delete them — email them to yourself, save them to cloud storage, or both.
Your Complete Move-In Deep Cleaning Checklist
Whole Home:
- [ ] HVAC filter replaced and dated
- [ ] All air vent covers removed, washed, and reinstalled
- [ ] All doorknobs and light switches disinfected
- [ ] All windows cleaned inside
- [ ] Window sills and tracks cleaned
- [ ] Baseboards wiped throughout
Kitchen:
- [ ] Refrigerator emptied, shelves and drawers washed, interior disinfected, coils vacuumed
- [ ] Oven cleaned inside and out (racks cleaned separately)
- [ ] Stovetop and grates scrubbed; under-grate area cleaned
- [ ] Hood vent degreased
- [ ] Microwave interior cleaned
- [ ] Dishwasher run with vinegar then baking soda; filter cleaned
- [ ] All cabinet interiors and exteriors wiped
- [ ] Countertops and backsplash disinfected
- [ ] Sink and drain cleaned and deodorized
- [ ] Garbage disposal cleaned and deodorized
- [ ] Floor swept and mopped
Bathrooms (each):
- [ ] Toilet seat replaced or fully disinfected
- [ ] Toilet bowl, exterior, and behind-base cleaned
- [ ] Shower and tub scrubbed; grout cleaned with brush
- [ ] Showerhead descaled with vinegar soak
- [ ] Drain cleared
- [ ] Sink, faucet, and vanity interior cleaned
- [ ] Exhaust fan cover removed and washed
- [ ] Mirror and fixtures cleaned
- [ ] Floor mopped
Bedrooms (each):
- [ ] Ceiling corners dusted
- [ ] Ceiling fan blades wiped
- [ ] Windows cleaned; sills and tracks cleared
- [ ] Closet shelves, rod, and floor cleaned
- [ ] Baseboards wiped
- [ ] Carpet vacuumed in two directions (consider professional cleaning)
- [ ] Hard floors swept and mopped
Living Areas:
- [ ] Ceiling fan blades wiped
- [ ] All surfaces dusted top to bottom
- [ ] Light switches and outlet covers disinfected
- [ ] Fireplace inspected if applicable
- [ ] Floors vacuumed and mopped
Laundry Room:
- [ ] Washing machine drum cleaned (vinegar cycle)
- [ ] Front-loader door seal wiped and inspected
- [ ] Dryer lint trap and housing cleaned
- [ ] Surfaces wiped; floor cleaned
Garage and Basement:
- [ ] Swept out
- [ ] Shelving wiped
- [ ] Moisture and pest signs checked
Final Steps:
- [ ] Locks changed or rekeyed
- [ ] Toilet seats replaced
- [ ] All outlets and switches tested
- [ ] Electrical panel, water main, and gas shutoff located
- [ ] All rooms photographed and timestamped
The Bottom Line: Do It Before You Unpack
Two hours before the moving truck arrives or immediately after you get the keys — whichever comes first — is the most effective cleaning window of your entire tenancy. The empty home lets you work fast, reach everything, and clean to a standard that furniture and boxes make impossible.
The investment is a single day for most homes, and it pays off for years: in cleaner air, a more hygienic kitchen and bathroom, and the confident knowledge that what you moved into was thoroughly prepared for you — not just for the previous occupant.
Get more moving tips and tricks here.